LLVM架构
llvm-ir-tutorial/LLVM IR入门指南(1)——LLVM架构简介.md at master · Evian-Zhang/llvm-ir-tutorial · GitHub
int main() {

    return 0;

}
使用
clang test.c -o test
会经历哪些步骤
总体流程是
.c --frontend--> AST --frontend--> LLVM IR --LLVM opt--> LLVM IR --LLVM llc--> .s Assembly --OS Assembler--> .o --OS Linker--> executable
前端语法分析
第一步:将源代码转化成内存中的抽象语法树AST
clang -Xclang -ast-dump -fsyntax-only test.c
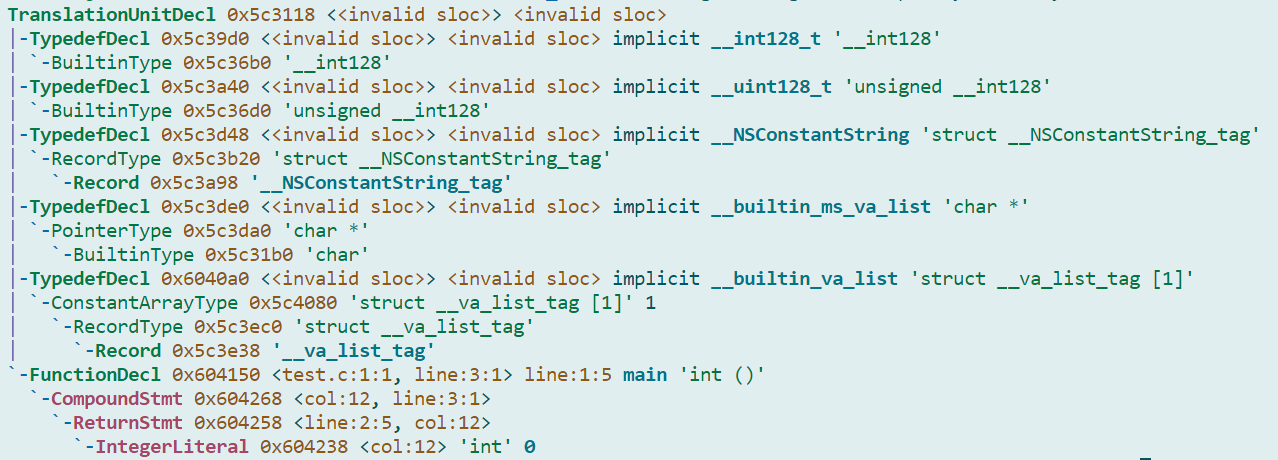
关注最后四行
`-FunctionDecl 0x604150 <test.c:1:1, line:3:1> line:1:5 main 'int ()'
  `-CompoundStmt 0x604268 <col:12, line:3:1>
    `-ReturnStmt 0x604258 <line:2:5, col:12>
      `-IntegerLiteral 0x604238 <col:12> 'int' 0
这才是我们源代码的AST。可以很⽅便地看出,经过Clang前端的预处理、语法分析、语义分析,我们的代码被分析成⼀个函数
- 其函数体是⼀个复合语句
- 这个复合语句包含⼀个返回语句
- 返回语句中使⽤了⼀个整型字⾯量 0 。
- 这个复合语句包含⼀个返回语句
注:
用clang -S emit-llvm test.c 生成human readable的test.ll
用clang -c -emit-llvm test.c生成比特码形式的test.bc
前端生成中间代码
第一步:根据内存中的抽象语法树AST生成LLVM IR中间代码
使用
clang -S -emit-llvm test.c
会生成一个test.ll文件
; ModuleID = 'test.c'
source_filename = "test.c"
target datalayout = "e-m:e-p270:32:32-p271:32:32-p272:64:64-i64:64-f80:128-n8:16:32:64-S128"
target triple = "x86_64-pc-linux-gnu"

; Function Attrs: noinline nounwind optnone uwtable
define dso_local i32 @main() #0 {
  %1 = alloca i32, align 4
  store i32 0, i32* %1, align 4
  ret i32 0
}

attributes #0 = { noinline nounwind optnone uwtable "disable-tail-calls"="false" "frame-pointer"="all" "less-precise-fpmad"="false" "min-legal-vector-width"="0" "no-infs-fp-math"="false" "no-jump-tables"="false" "no-nans-fp-math"="false" "no-signed-zeros-fp-math"="false" "no-trapping-math"="true" "stack-protector-buffer-size"="8" "target-cpu"="x86-64" "target-features"="+cx8,+fxsr,+mmx,+sse,+sse2,+x87" "tune-cpu"="generic" "unsafe-fp-math"="false" "use-soft-float"="false" }

!llvm.module.flags = !{!0}
!llvm.ident = !{!1}

!0 = !{i32 1, !"wchar_size", i32 4}
!1 = !{!"Ubuntu clang version 12.0.0-3ubuntu1~21.04.2"}
关注比较重要的5行
define dso_local i32 @main() #0 {
  %1 = alloca i32, align 4
  store i32 0, i32* %1, align 4
  ret i32 0
}
LLVM后端优化IR
LLVMd读取了IR之后,使用OPT组件对IR进行优化。他会根据输入的LLVM IR和优化等级,进行优化,并且输出对应的LLVM IR
可以用
opt test.ll -S -O3
也可以用
clang -S -emit-llvm -O3 test.c
优化,并且输出优化后的test.ll
; ModuleID = 'test.c'
source_filename = "test.c"
target datalayout = "e-m:e-p270:32:32-p271:32:32-p272:64:64-i64:64-f80:128-n8:16:32:64-S128"
target triple = "x86_64-pc-linux-gnu"

; Function Attrs: norecurse nounwind readnone uwtable willreturn
define dso_local i32 @main() local_unnamed_addr #0 {
  ret i32 0
}

attributes #0 = { norecurse nounwind readnone uwtable willreturn "disable-tail-calls"="false" "frame-pointer"="none" "less-precise-fpmad"="false" "min-legal-vector-width"="0" "no-infs-fp-math"="false" "no-jump-tables"="false" "no-nans-fp-math"="false" "no-signed-zeros-fp-math"="false" "no-trapping-math"="true" "stack-protector-buffer-size"="8" "target-cpu"="x86-64" "target-features"="+cx8,+fxsr,+mmx,+sse,+sse2,+x87" "tune-cpu"="generic" "unsafe-fp-math"="false" "use-soft-float"="false" }

!llvm.module.flags = !{!0}
!llvm.ident = !{!1}

!0 = !{i32 1, !"wchar_size", i32 4}
!1 = !{!"Ubuntu clang version 12.0.0-3ubuntu1~21.04.2"}
可以发现main函数确实被优化了
LLVM后端生成汇编代码
LLVM后端做的最后一步,就是由LLVM IR生成汇编代码,这是由llc组件完成的
可以用
llc test.ll
生成test.s
	.text
	.file	"test.c"
	.globl	main                            # -- Begin function main
	.p2align	4, 0x90
	.type	main,@function
main:                                   # @main
	.cfi_startproc
# %bb.0:
	xorl	%eax, %eax
	retq
.Lfunc_end0:
	.size	main, .Lfunc_end0-main
	.cfi_endproc
                                        # -- End function
	.ident	"Ubuntu clang version 12.0.0-3ubuntu1~21.04.2"
	.section	".note.GNU-stack","",@progbits